Random Documentation
View DemoSupport CenterOur PortfolioPurchase Now
  • GREETING
    • Welcome to Random
    • How To Get Support
    • Full Theme Features
    • Change Log
    • FAQs
  • ⚙️INSTALLATION
    • How to Install & Activate
    • Where Is My Purchase Code?
    • Transfer License To a New Domain
    • Importing Sample Images
    • Importing Products With a CSV File
  • ⚙️GENERAL SETTINGS
    • Theme Settings
    • Header Settings
    • Edit Default Theme Content
    • Theme Colors
    • Typography
    • Product Element Settings
    • Enable Customer Account
    • Social Media
    • Wishlist
    • Product Review App
    • Search Settings
    • Newsletter Popup
    • Currency Settings
    • Free Shipping Threshold
    • Create Cross-Sell Collection
    • Enable RTL Layout
    • Notify Me When Out Of Stock
    • Breadcrumbs Settings
    • Metafields Settings
    • Favicon
    • Checkout
  • MENU SETTING
    • Main Menu
  • CART SETTINGS
    • Mini Cart
  • PRODUCT PAGE SETTINGS
    • Setup Product Page Layout
    • Product Page Settings
    • Variants Settings
    • Product Pre-Order
  • COLLECTIONS PAGE
    • Setup Collection Page Layout
    • Collection Page Settings
    • Filter Sidebar
  • BLOG SETTINGS
    • Setup Blog Page Layout
    • Setup Blog Detail Layout
    • Blog Comment Settings
Powered by GitBook
On this page
  • Step 1: Create a Metafield definition
  • Step 2: Add values to Metafields
  • Step 3: Publishing your Metafield to your online store

Was this helpful?

  1. GENERAL SETTINGS

Metafields Settings

PreviousBreadcrumbs SettingsNextFavicon

Was this helpful?

Metafields helps you to customize the functionality and appearance of your Shopify store by letting you save specialized information that isn't usually captured in the Shopify admin. You can use metafields for internal tracking, or to display specialized information on your online store in a variety of ways

If you want to learn more about Metafield, please read more

Step 1: Create a Metafield definition

  1. From your Shopify admin, go to Settings > Custom data.

  2. Below the metadata field, click the item where you want to add a Metafield.

  3. Click Add definition

  4. Name your metadata field definition

  5. Choose the type that matches the content you want to use

  6. Click Save button


Step 2: Add values to Metafields

  1. From your Shopify admin, go to Products, Collection, Blog, Page, …

  2. Click on a product for which you want to add the Metafield

  3. Scroll down and click on Metafields. Enter text for that item.

  4. Click Save button


Step 3: Publishing your Metafield to your online store

  1. From your Shopify admin, go to Online Store > Themes.

  2. Find the theme you want to edit, and then click Customize

  3. Use the drop-down menu at the top of your screen to select Products > Default product. This loads the default product template in the theme editor.

  4. In the Product information section, click Add block > Collapsible row.

  5. Enter a heading.

  6. Optional: Choose an Icon from the list or click the None for no icon.

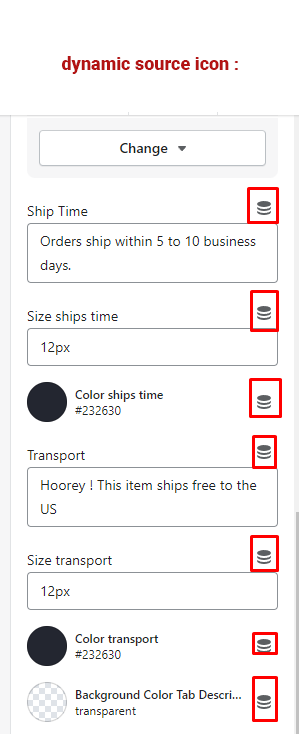
  7. Next to the row content, click the Connect dynamic source icon

  8. Click Save to publish your product.

⚙️
here